Why have [good] bad renovation Photos
Not All Bad Renovation Photos Are Equal
Sure your PMs already take bad renovation photos with their cellphones, how can it get any worse than that right? Truth be told, you don’t want bad before photos. What you actually want is good-bad before photos. Not poor quality shots of a home that looks okay, but good quality shots that exemplify a transformation.
Consider this, to be used for marketing colour, sharpness, and resolution have to be good. Furthermore careful consideration has to be made to camera angles and lighting, same as the after photos. If your PMs simply snap some cellphone photos, the probability of a good before and after comparison goes out the window.
WHY PAY FOR [GOOD] BAD PHOTOS
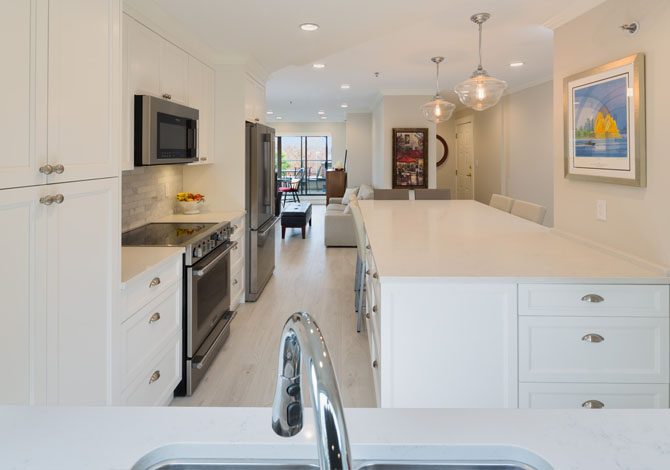
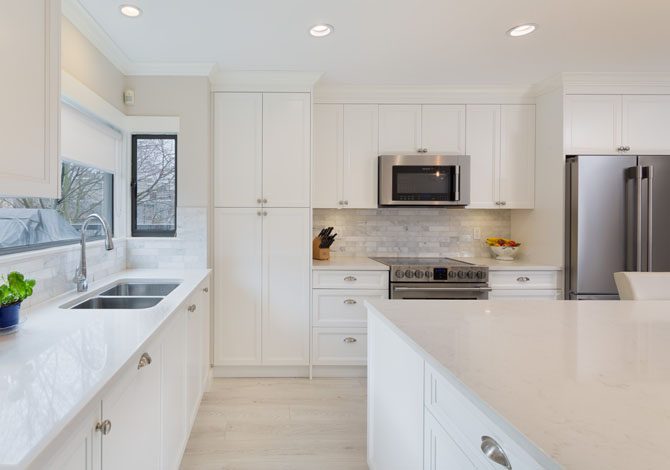
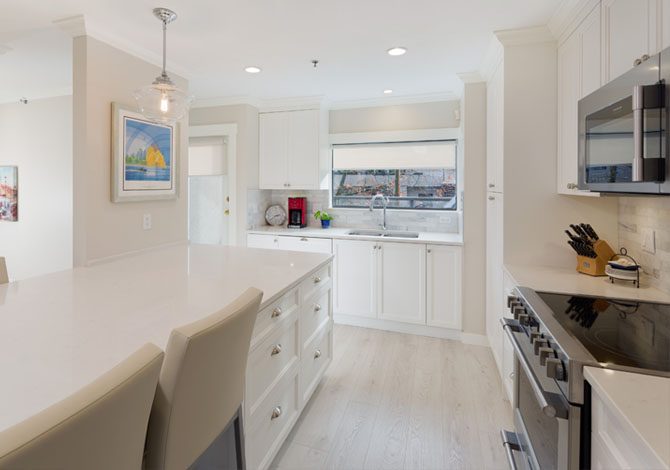
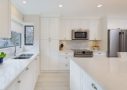
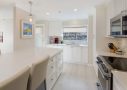
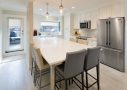
Your clients want to see photos that have strong impact when it comes to before and afters, they want to see a transformation!
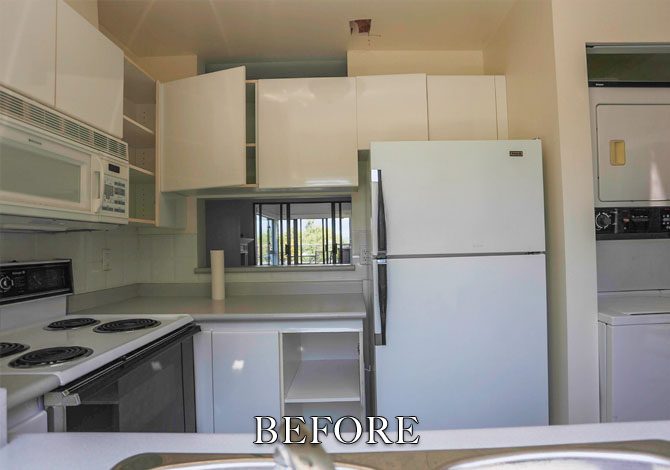
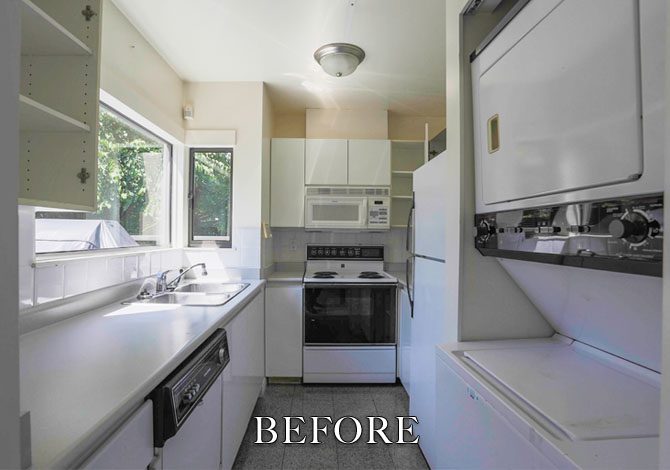
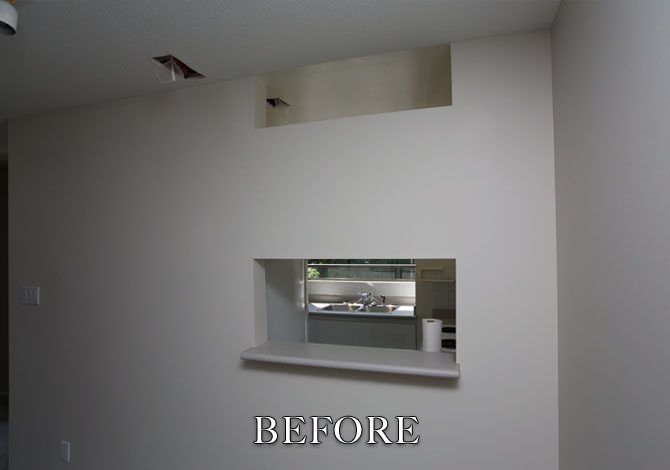
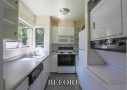
Many of my clients know that the value in good renovation photos is found in the comparison of before and afters. In other words they are happy to pay for professionally bad photography! Why do I say professionally here? Because often the home being demoed is not that bad, it just doesn’t work for the clients lifestyle any more. So poor lighting is used to accentuate the difference between before and after photos. This is just one example, here are some more:
When your PM takes photos of the sink or the tub their cellphone is not wide enough to capture the whole room the way the professional will take after photos.
For an accurate comparison the same angle should be used in the before and after photos. Even when the before photo has a wall that will be demolished to allow for the extension of a kitchen island.
How can my PM take better photos?
Sure thing! Of course it’s not necessary to hire a professional photographer to take before renovation photos. Here are a couple things that can be done on site by your PM to end up with better photos.
- Put your cellphone into panorama mode and hold your camera vertically – this will increase the viewable area as well as resolution.
- Set the camera into HDR (high dynamic range) mode this will help to retain some of those highlight and lowlight details.
- Make sure to choose angles based on the final floor plan, and not the existing one.
It takes considerably less time to shoot befores as it does afters, making it an affordable addition. Inquire for an estimate.
Project details:
- Client: Alair Homes Vancouver
- Project Started: May 30, 2016
- Completed on: January 15, 2017
- Category: Architectural